Yulla Kanda Trek Guide (2026): Cost, Route & Return

Kinnaur, Himachal Pradesh

Yulla Kanda Trek: The Complete Guide

Planning notes from a self-guided June trek to the lake temple above Yulla Khas — the trail, the transport, and how you actually get back down.

Yulla Kanda is a high-altitude lake in Kinnaur, Himachal Pradesh, home to what's widely called the world's highest Krishna temple — sitting quietly at the edge of the water at close to 3,895 metres. It's reached by a trek from Yulla Khas village that runs through forest and a lot of stairs before ending in one genuinely steep final stretch, and it draws pilgrims especially around Janmashtami, though it's walkable across a much wider season than that.

This guide covers everything you need to actually plan the trip: how difficult it is, what the trail is like stage by stage, every leg of getting there, what it costs, and — the part almost nothing else online tells you — how you get back down. We did this trek ourselves, without a guide, in June, and everything specific below comes from that trip rather than secondhand research. Where we've included commonly cited figures we didn't verify firsthand, we've said so.
If you want the full story of that trip — the parts that didn't go to plan included — we've written about it separately. Use this guide for the planning; use that one for the experience.
The view over Yulla Kanda lake, framed by the surrounding peaks
images/yulla-kanda-view.jpg
The lake and the peaks around it, from near the top of the final stretch.

The story behind the temple

Part of what makes Yulla Kanda worth the climb, beyond the trek itself, is what's waiting at the top. As local legend has it, the temple was built by the Pandavas during their exile in the Himalayas, which is part of why it's spoken of locally as one of the older Krishna shrines in this part of Kinnaur. What makes it visually unusual — and the reason photos of it circulate the way they do — is that the small shrine sits right at the lake's edge, so the water and the temple read as one composition rather than two separate things to look at. Treat the temple's exact origin story as oral tradition rather than documented history; versions vary depending on who you ask locally, and that's part of the charm rather than a gap worth resolving.

This is also why the lake draws real pilgrim traffic around Janmashtami specifically, not just trekkers chasing a view. Janmashtami's date shifts every year because it's set by the lunar calendar rather than a fixed Gregorian date, so don't assume last year's date applies — check the current year's Janmashtami date a few weeks out if you're deliberately timing your visit around it, or deliberately avoiding it for a quieter trail.
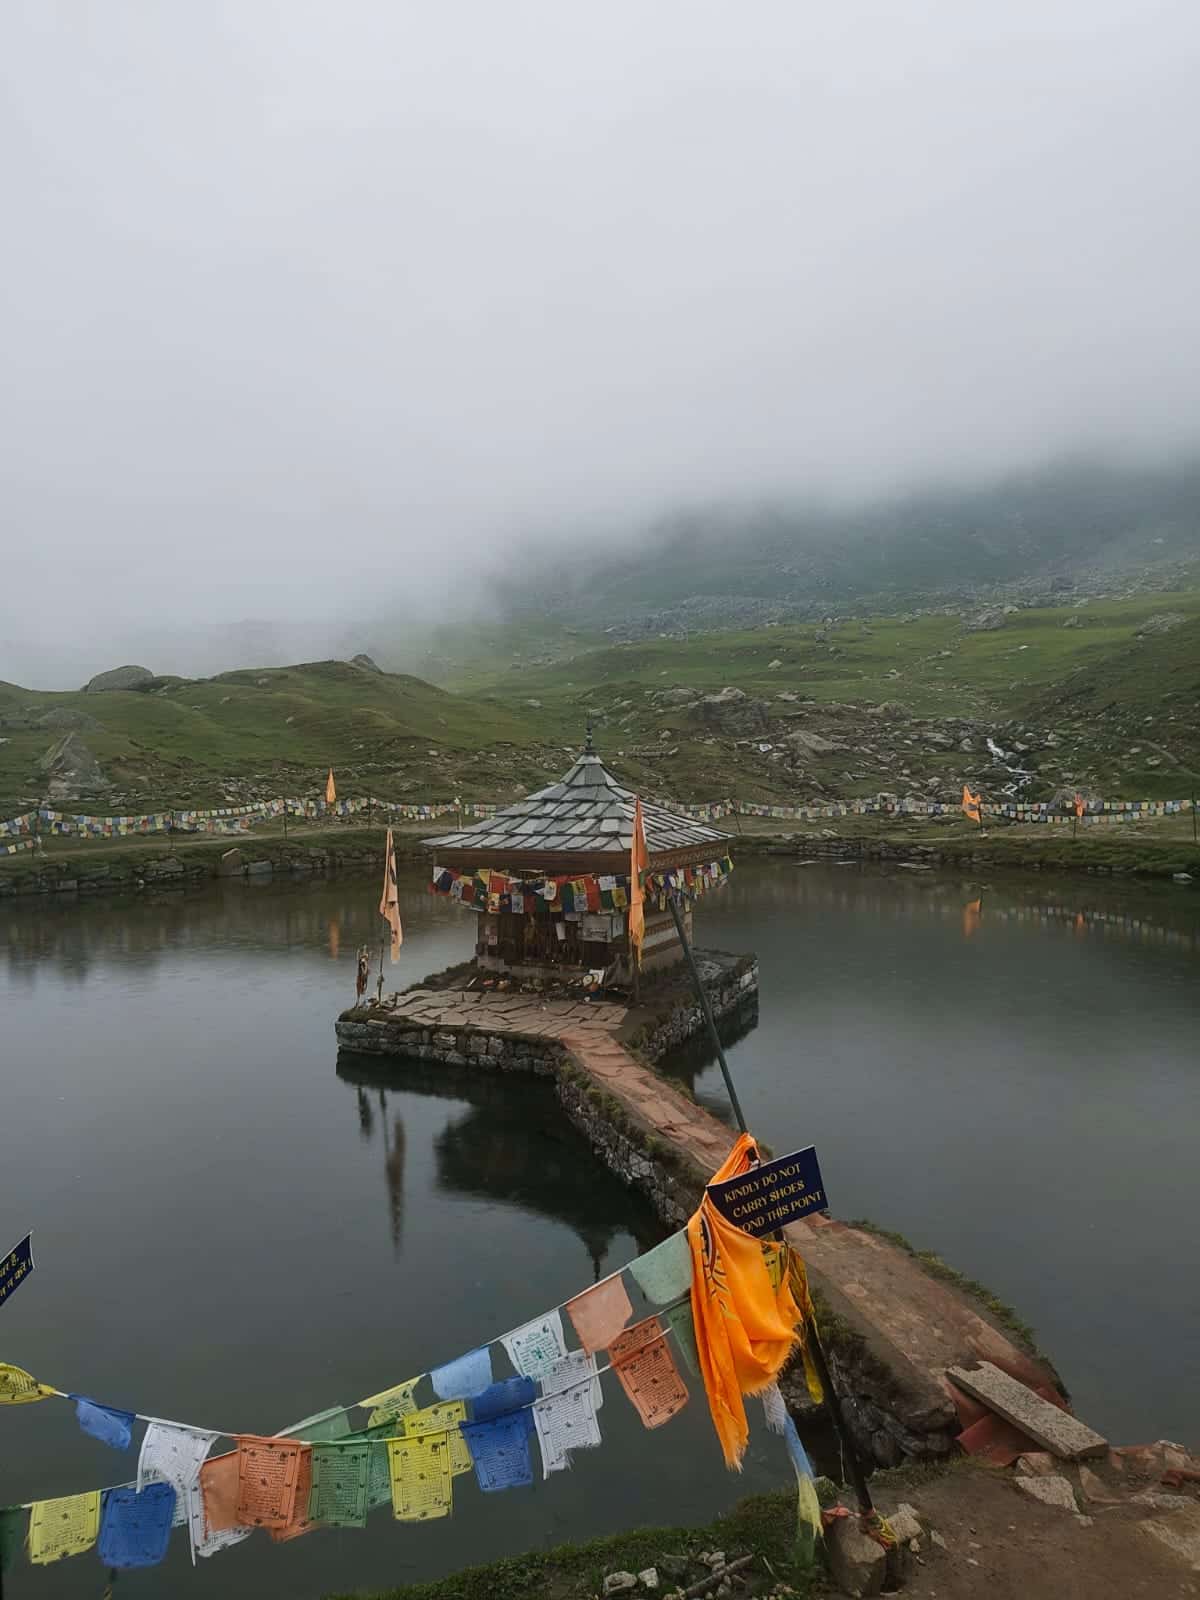
The small Krishna temple at the edge of Yulla Kanda lake
images/yulla-kanda-temple.jpg
The temple sits right at the water's edge — the reason it photographs the way it does.

Yulla Kanda trek at a glance

Location
Rora Valley, Kinnaur district, Himachal Pradesh
Starting point
Yulla Khas village
Altitude
~3,895 m
Approx. distance
Commonly cited as 11–12 km one-way; we didn't measure this ourselves, so treat it as a planning estimate
Trek duration
Doable in one long day, or comfortably over two days with an overnight stay
Difficulty
Moderate overall, with a genuinely steep, demanding final ~3 km
Best time
Late spring through early autumn; we went in June and had good conditions
Guide required?
Not mandatory, but the trail isn't always clearly marked in the upper stretches
Permit needed?
No, for Indians or foreign nationals — this trek sits well before Kinnaur's Inner Line Permit boundary. Carry photo ID regardless
Water on trail
Available at camps before the final gate; none reliably available after it
Network
Airtel worked for most of our route; other carriers didn't
Approx. cost
Roughly ₹4,500–6,000 per person for the Delhi-to-Yulla Khas leg, trek included

Is Yulla Kanda safe?

Yes, for most reasonably fit people who plan around the weather and don't treat it as a casual afternoon walk. There's nothing technical about the trail — no climbing, no exposure — but it is a genuine mountain trek with a punishing final stretch, facilities that disappear past a certain point, and return transport that can catch you out if you don't plan for it. The three things actually worth respecting here are rain (it makes the trail slippery), daylight (there's no lighting once the sun sets), and transport out of Yulla Khas (it's less straightforward than it looks on a map). Get those three right and the rest is very manageable.

Do you need a permit?

If you're Indian, no — you don't need any permit for this trek or for Kinnaur in general. A government photo ID (Aadhaar, driving licence, passport) is enough.

If you're a foreign national, the short answer is also no, for this specific trek. Kinnaur's Inner Line Permit (ILP) requirement only kicks in beyond the Jangi checkpost, which sits about 35 km past Reckong Peo — well beyond Yulla Khas and the Rora Valley side road you'll be turning off onto. So getting to and doing the Yulla Kanda trek itself doesn't require an ILP either way.

Where this changes: if you're combining this trek with onward travel into upper Kinnaur or Spiti (Nako, Pooh, Tabo, Kaza and beyond), that's a different story — foreign nationals need an ILP for that stretch, obtainable from the DC office in Reckong Peo or the Sugam Centre in Shimla. That's a permit for the rest of your trip, not for Yulla Kanda, so plan for it separately if your itinerary continues that far.

Either way, carry a valid photo ID on you throughout — there's routine police checkpost registration in this region regardless of permit status.

Best time to visit

Late spring through early autumn is your safest window. We went in June and had good weather for the trek itself — comfortable daytime temperatures and a clear trail.

Monsoon months bring the biggest variable: heavier rain increases the risk of a slippery trail and difficult stream crossings, so if you're travelling in that window, check conditions in the 48–72 hours before you go, not weeks in advance, since things can change fast in the mountains.

Whatever month you choose, check the forecast again the morning you set out from Yulla Khas. Rain — not the trail's baseline difficulty — is the single biggest thing that turns a manageable trek into a genuinely risky one.

How difficult is Yulla Kanda, really?

Forget "moderate to difficult" as a description on its own — here's what it actually feels like.

A large portion of the trail is literal stairs, not a regular dirt incline. That's a different kind of tiring: it loads your quads going up and your knees coming down in a way a smooth path doesn't, so if your trekking experience so far has been on graded trails, expect this to feel harder than "moderate" suggests.

The trail is manageable for most of its length. The real test is the final roughly 3 km, starting from the last gate before the lake — steep enough that it will genuinely slow down even fit trekkers. We stopped at a camp near that point specifically to catch our breath and refuel before pushing on. That's not a sign of being underprepared — it's just what that stretch is like.

Altitude is worth factoring in too. At close to 3,900 m, mild breathlessness or fatigue on the final stretch is realistic even for fit trekkers, particularly without acclimatization days built into your itinerary beforehand. Pace yourself, drink enough water, and rest rather than push through a genuine headache or dizziness.

Who can do this trek?

"Reasonably fit" here means comfortable walking for several continuous hours, able to handle repeated flights of stairs without needing to stop constantly, and okay with one sustained steep uphill push near the end. You don't need prior high-altitude experience, but general fitness matters more on this trek than on a flatter, longer walk.

Is it suitable for kids or older trekkers?

There's no age limit or technical barrier stopping a fit child or an older trekker from doing this, but be honest about what "fit" means here specifically: sustained stair-climbing for hours, not just general good health. A child who's used to long hikes will likely be fine; a child who tires quickly on stairs will find the final 3 km genuinely miserable, and there's no shortcut or easier alternate path once you're committed to that stretch.

For older trekkers, the altitude is probably the bigger factor to think through honestly (and ideally with a doctor if you have any cardiac or respiratory history) than the stairs themselves — plenty of older trekkers do fine here, but the "push through it" approach that might work at lower altitudes is exactly the wrong instinct at close to 3,900 m.

If you're bringing kids, building in the overnight option rather than attempting same-day is the easier call — it removes the daylight pressure entirely and lets the group move at whatever pace the slowest member needs, without the clock working against you.

Elevation and trail markers

We didn't carry a GPS device or record a GPX track, so we can't hand you a verified elevation profile — treat any elevation-gain figure you see quoted online (including ours) as an estimate rather than a measured number. What we can tell you from experience: the gain is front-loaded and back-loaded rather than steady. The approach from Yulla Khas climbs gradually through forest and stairs, flattens out somewhat through the camp stretch, then gains most of its remaining elevation sharply in that final ~3 km.

Trail marking thins out noticeably past the final gate. Lower down, the path is obvious — you're following stairs and a well-trodden route past camps. Higher up, especially where the trail crosses open ground or scree, the path can briefly disappear or fork without obvious signage. This is exactly where downloading offline maps (Google Maps offline areas or a dedicated app like Organic Maps) earns its keep, and why we'd rate a guide as "useful for peace of mind" rather than "unnecessary" if you're not confident route-finding on unmarked ground.

Who should think twice?

If you're not comfortable with several hours of sustained stair-climbing, if you're trekking in uncertain weather with no flexibility to reschedule, or if you're relying entirely on finding water and facilities along the entire route rather than carrying your own for the final stretch, this is worth reconsidering or at least planning around more carefully — not because the trek is extreme, but because those specific factors are where it gets genuinely harder than it looks from the trailhead.

The trail, stage by stage

Most descriptions of this trek stop at "forest, stream crossings, alpine meadow." Here's what that actually breaks down to.
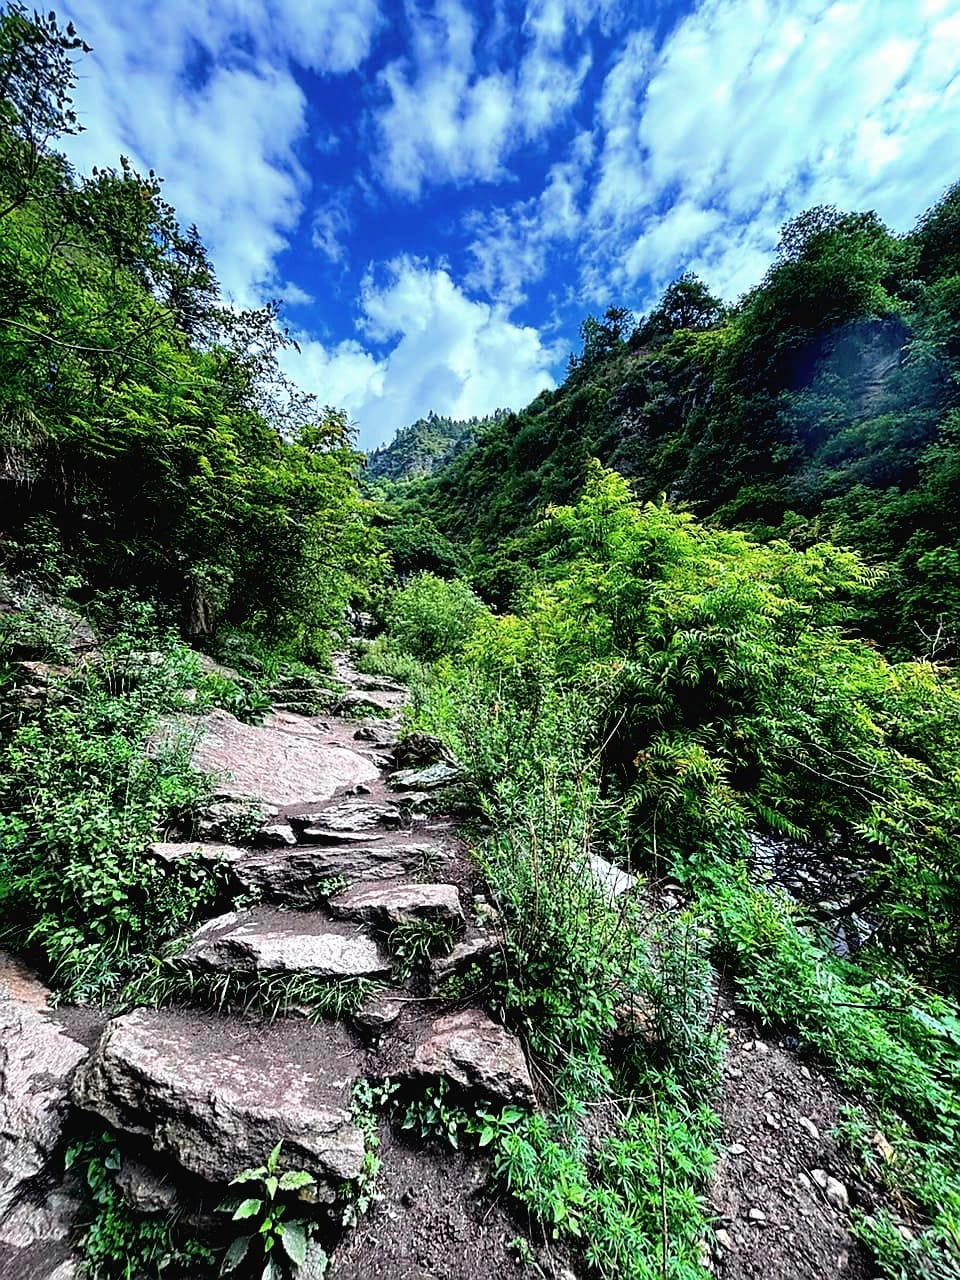
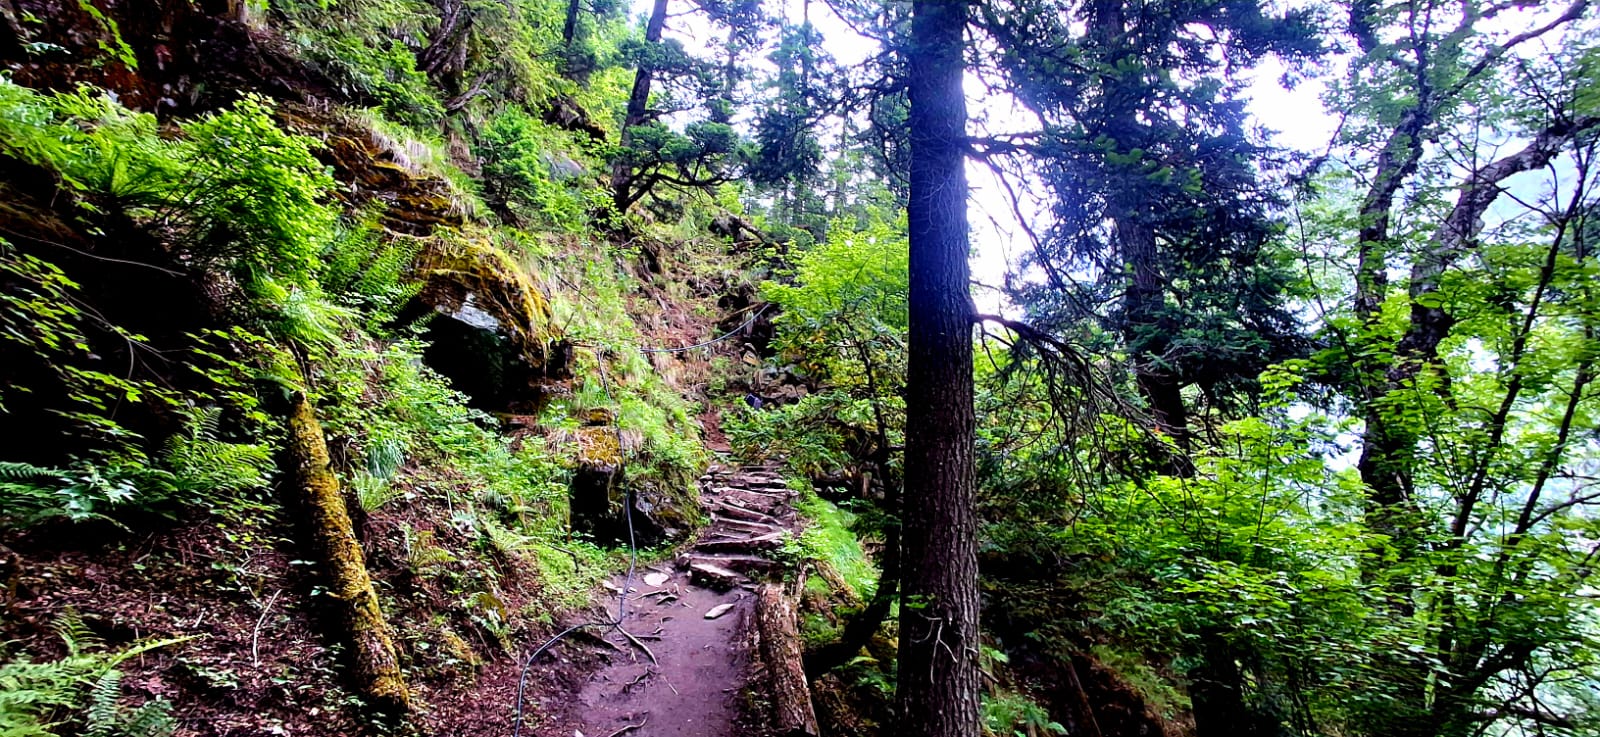
The trail winding through forest and stairs below Yulla Khas
images/yulla-kanda-route.jpg
A large stretch of the lower trail is exactly this — forest path broken up by long runs of stairs.
  1. 1

    Yulla Khas to the lower trail

    The trek begins right from Yulla Khas village. Even getting to your homestay or the trailhead itself involves a fair amount of uphill walking — our homestay was listed as 0.8 km away, but that distance was almost entirely stairs and felt considerably longer than the number suggested. Expect the trail itself to start in a similar vein: a mix of forest path and stairs from early on, not a flat warm-up stretch.

  2. 2

    Lower trail to the camps

    As you move further along, you'll start passing camps set up along the route. These sell food and drinks and are where you should refill water, since this is the last reliable point to do so. Treat this stretch as your resupply zone — top up here rather than pushing on and hoping for another chance later.

  3. 3

    The final gate

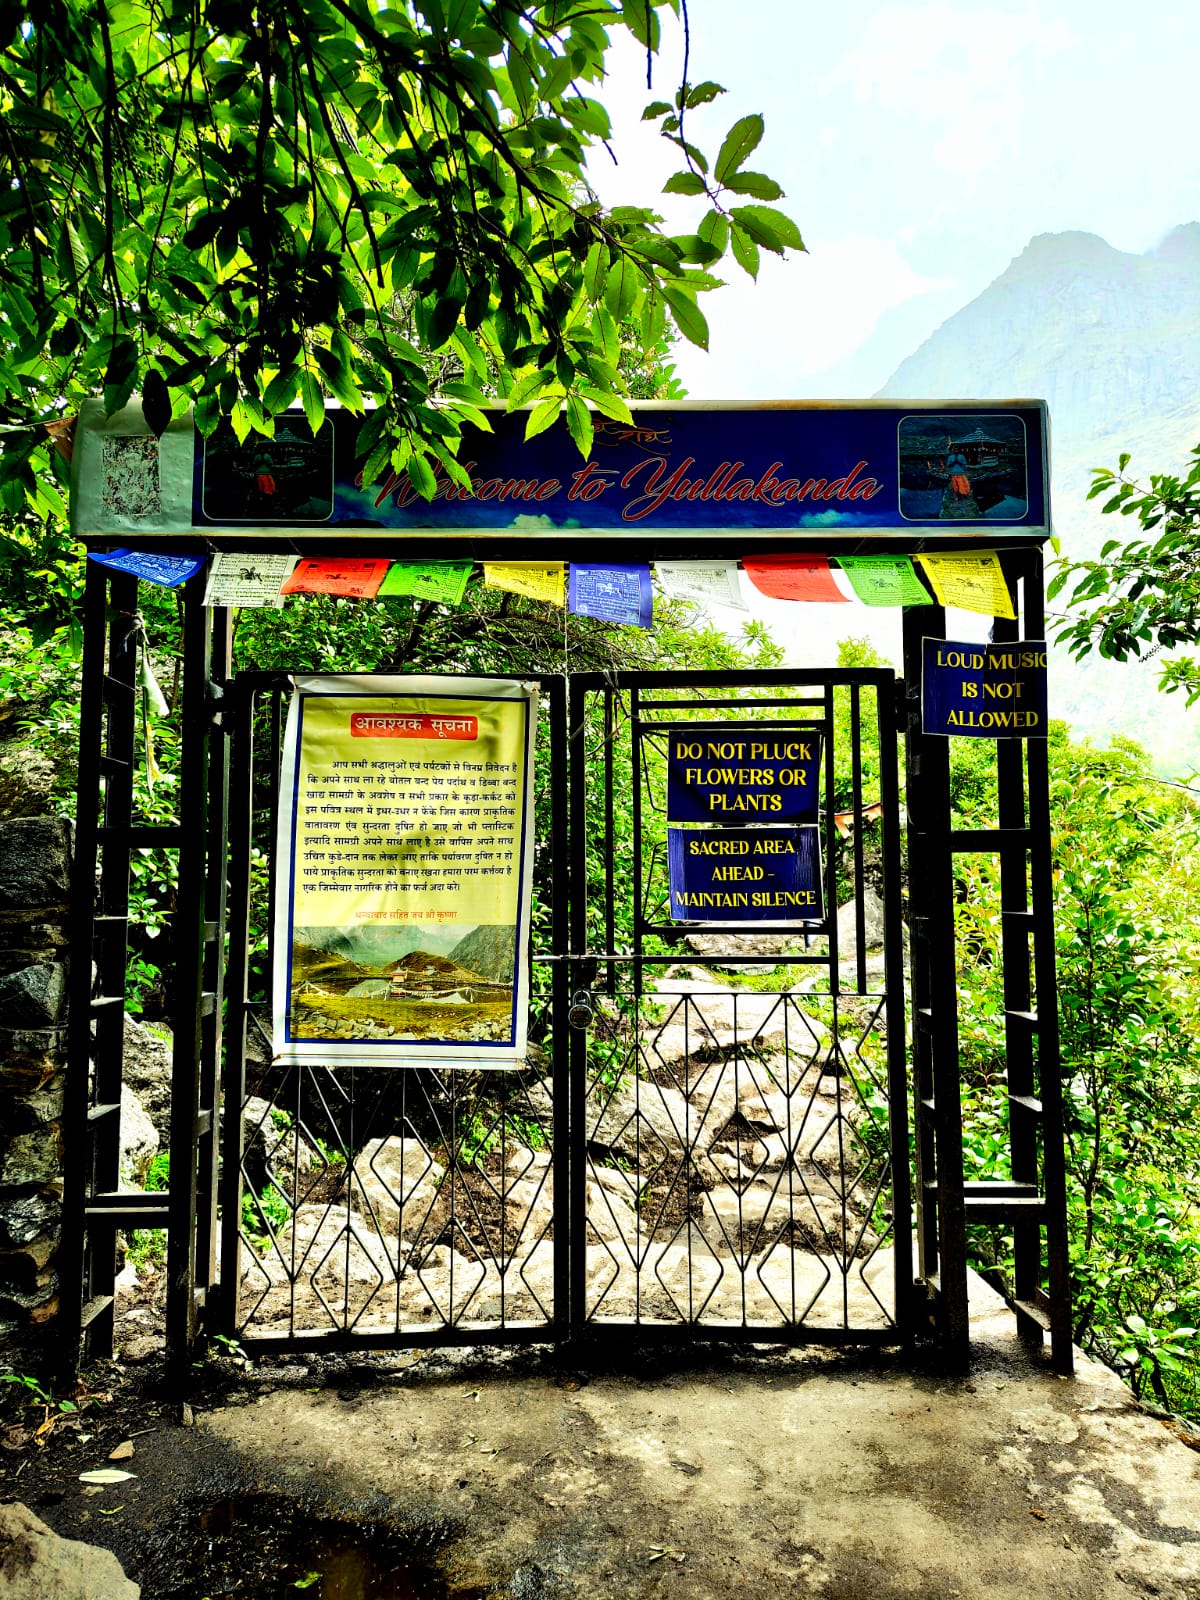
    This is the clear dividing line on the trail. Past this gate, the camps and facilities stop entirely. There's nothing to buy and no guaranteed water source you can count on beyond an occasional stream — this is where the trek shifts from "supported" to "self-sufficient," and it's worth pausing here mentally as much as physically to make sure you're carrying what you need for the rest of the way up.

    The final gate marking the start of the unsupported stretch of trail
    images/yulla-kanda-gate.jpg
    Past this point: no camps, no shops, no guaranteed water. Stock up before you cross it.
  4. 4

    The final 3 km

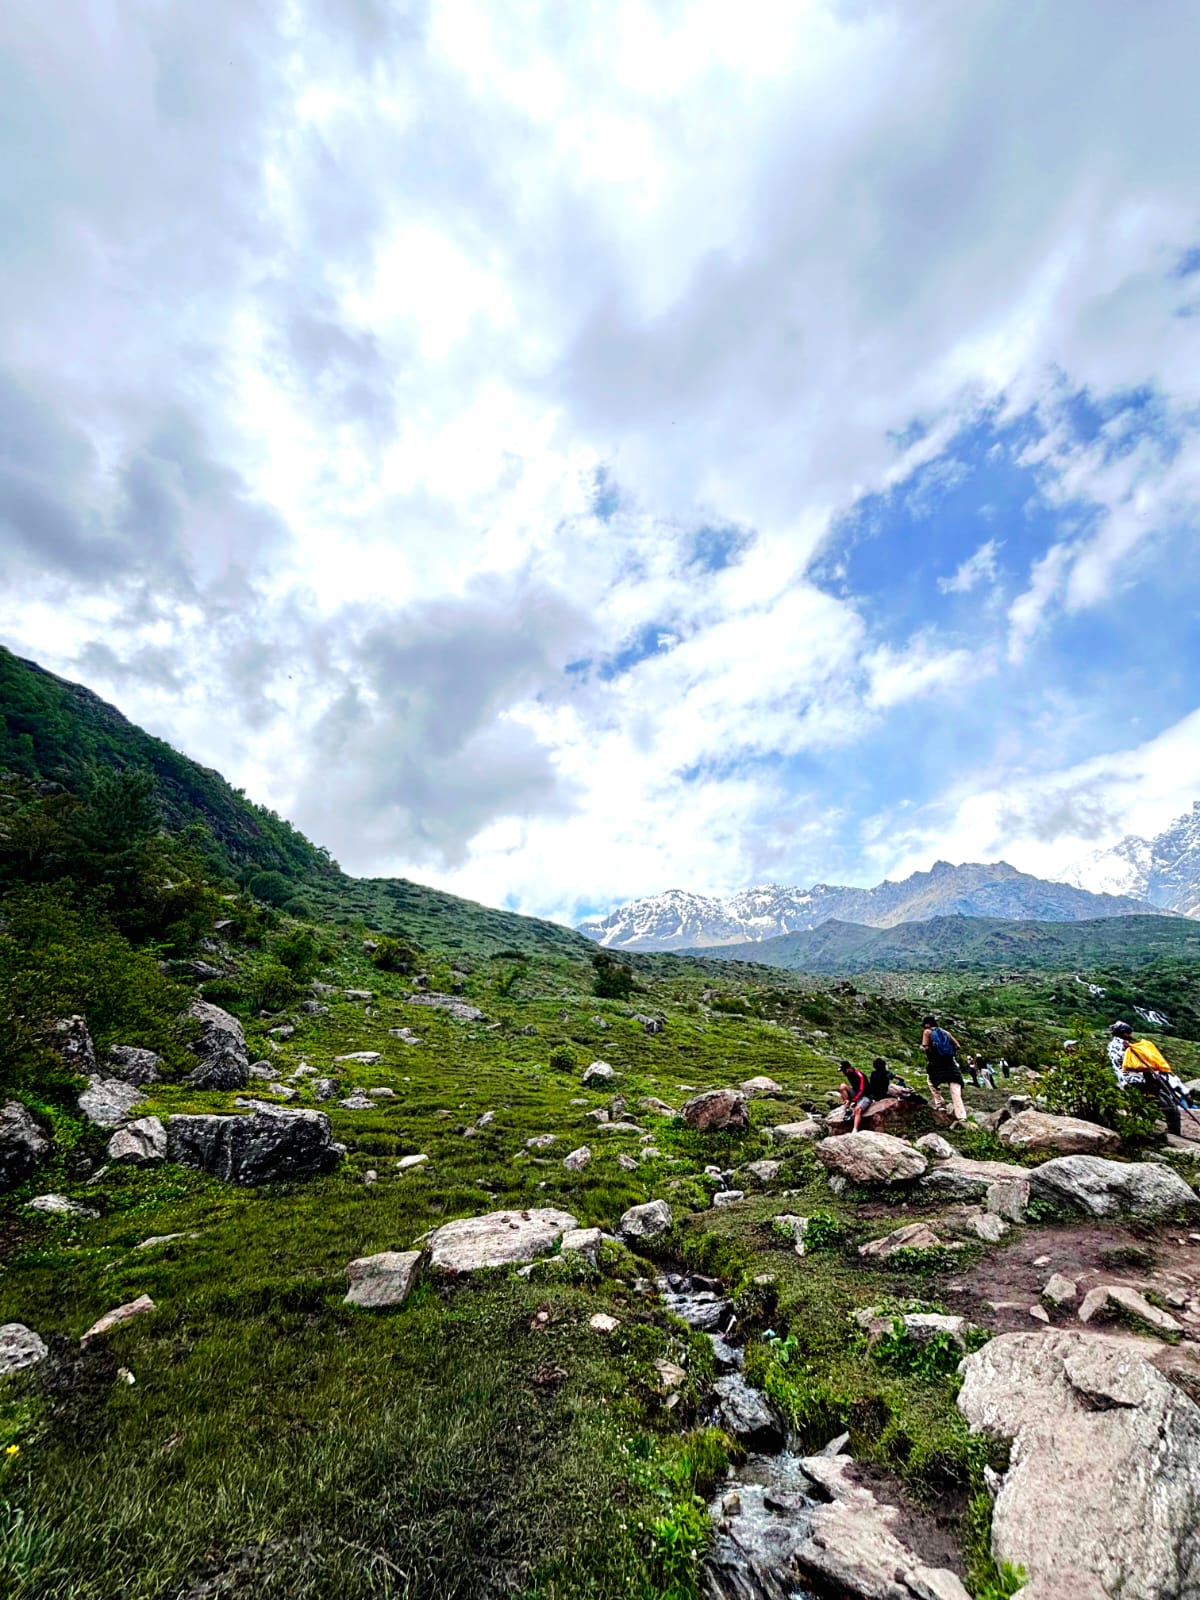
    This is the hardest part of the entire trek, and it deserves to be treated that way rather than glossed over. The gradient steepens noticeably, the stairs keep coming, and this is the stretch where, in our own words, your body will genuinely start to give up. We stopped at the camp right at the start of this stretch to rest and refuel before continuing — budget real time for this section rather than assuming your earlier pace will hold. If you're doing this same-day, this is also the section where a delayed start becomes a real problem, since it's the slowest, most tiring part of the whole trek.

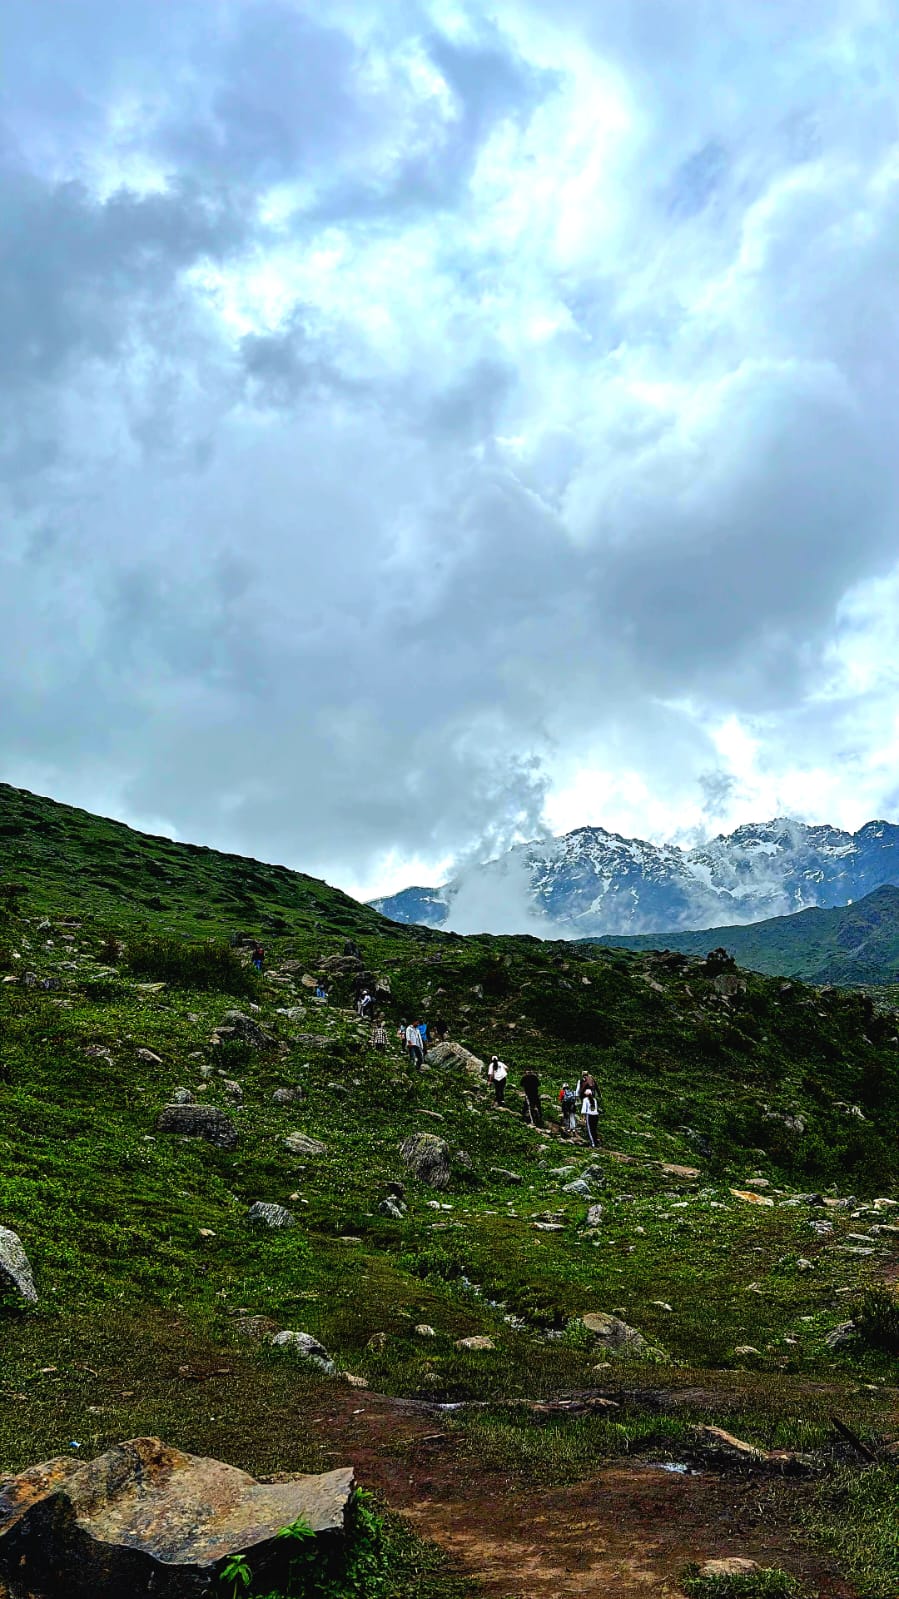
    The unsupported trail beyond the final gate, climbing steeply toward the lake
    images/yulla-kanda-after-gate-1.jpg
    Beyond the gate, the trail steepens fast — this is the stretch that separates a walk from a trek.
    The final steep stretch of trail beyond the gate, close to the summit
    images/yulla-kanda-after-gate-2.jpg
    No camps, no shops, just the climb — the final 3 km in its rawest form.
  5. 5

    Arrival at the lake and temple

    The payoff for all of the above: the lake opens up with the small Krishna temple at its edge, framed by the surrounding peaks. Most trekkers spend anywhere from 30 minutes to an hour or so here before starting back down — enough time to rest, eat, and take in the views without eating too far into your descent window, particularly if you're aiming to be back before dark.

    A few basic etiquette points worth knowing before you arrive: this is an active place of worship, not just a scenic viewpoint, especially around Janmashtami when pilgrim numbers are highest. Remove footwear before approaching the shrine itself, keep noise down near anyone in prayer, and ask before photographing people at the temple rather than assuming it's fine.
Can you do it in one day?

Yes — but whether you should depends on your fitness, your start time, and how much buffer you want.

PlanStartReturnBest suited to
Same-dayBefore sunriseBy 7pmFit trekkers, confirmed good weather, comfortable with one long single day
OvernightMorning start, descend the next dayNext morning/afternoonAnyone wanting a relaxed pace, a buffer against fatigue or weather, or time to enjoy the lake without rushing

If you're attempting it same-day, start walking before sunrise — this isn't for atmosphere, it's the only way the math works out. Between the stairs, the steep final stretch, time at the top, and the descent, an 8am start doesn't leave enough margin to comfortably be back before dark. We started our own trek day at 8am, but that was with an overnight stay booked on both ends, giving us a full extra day to work with rather than compressing everything into daylight hours.

Try to be back at your base before 7pm regardless of which plan you pick. There's no lighting anywhere on the trail, and descending stairs or crossing streams in the dark is a genuinely avoidable risk.

On cost: staying overnight near the top versus heading straight back down doesn't actually save much money — a camp near the summit runs roughly ₹1,000 per person including meals, while a return cab from Yulla Khas costs around ₹500. The gap is small enough that this should be a time-and-energy decision, not a budget one.

Acclimatization: where to break the journey

Yulla Khas itself sits at a moderate elevation, but you're gaining altitude fast on the drive in from Shimla (around 2,200 m) through Narkanda and Rampur, before the trek then takes you up to almost 3,900 m. Moving through that gain in a day or two, as we did, works fine for most people but isn't the cautious approach — mild headache or fatigue on the final stretch is the kind of thing that's harder to distinguish from "just tired" versus "altitude catching up with you" if you haven't given your body any buffer at all.

If you have the extra day or two, break the Delhi–Yulla Khas journey with a night at one of these rather than pushing straight through:

  • Narkanda (~2,700 m): The first natural stop on the Shimla–Kinnaur road. Good for easing into altitude gently and low-effort if you're already tired from an overnight bus.
  • Sarahan (~2,150 m): A short detour off the main road, home to the Bhimakali Temple — a worthwhile stop in its own right, not just a sleep-and-move waypoint.
  • Sangla or Kalpa (~2,600–2,900 m): Both sit close to Kinnaur's main road and work well if you're planning to explore the wider Kinnaur circuit either before or after the trek.

None of this is mandatory — plenty of people do this trek without any dedicated acclimatization stop and are fine. But if you have any history of altitude sensitivity, or you're combining this with the wider Kinnaur circuit anyway, building in one extra night along the way is a cheap way to reduce risk rather than a wasted travel day.

Itinerary options

Option one

Comfortable two-day trek

Day 1: Travel to Yulla Khas, overnight at a homestay (budget extra time for the uphill approach to your accommodation).
Day 2: Start the trek in the morning, reach the lake, spend time there, and either descend the same day or stay overnight near the summit depending on pace and conditions — then head back to Yulla Khas.

Option two

Same-day trek

Start before sunrise. Aim to reach the lake with enough daylight left to rest, eat, and begin descending well before your 7pm target. Arrange your return transport from Yulla Khas before you start the trek — don't leave this until you're back down.

Option three

Part of a wider Kinnaur trip

Since the route naturally continues on through Reckong Peo, this trek fits well as one leg of a longer Kinnaur itinerary. We continued from Peo onward to Kalpa after finishing here — worth considering if you're already making the multi-day journey out to this part of Kinnaur rather than treating it as a single-purpose trip.

Water and food on the trail

The trail has a clear before-and-after split, and it's worth knowing exactly where the line is.

Before the final gate

Camps along the route sell food and drinks, and you can ask them for drinkable water. You don't need to carry much for this stretch — treat these as your refill points.

After the final gate

No camps, no food, nothing to buy for the rest of the approach to the lake. Carry at least 1 litre of water before you reach this point. A stream flows in this upper section, and locals can sometimes tell you if it's currently safe — treat that as a fallback, not a plan.

Network connectivity

During our trek, Airtel was the only network we found working reliably for most of the route — other carriers didn't get signal in the stretches we checked. Coverage in remote mountain areas can change over time, so don't build your plans around having connectivity at any point past Yulla Khas. Download offline maps and tell someone your rough schedule before you lose signal.

Health, safety, and emergency contacts

Nobody plans for needing this section, but it's worth having before you go rather than searching for it with one bar of signal.

  • Nearest hospitals: Jindal Sanjeevani Hospital, a private multi-specialty hospital in Sholtu near Tapri, is the closest option to Yulla Khas. For a government facility, Regional Hospital Reckong Peo (01786-222319) is about a 35–40 km drive from Tapri and is the more equipped option for anything serious.
  • Police: Police Station Tapri (01786-261230) is the nearest station and the right first call for anything trail-related in this immediate area.
  • Altitude sickness basics: mild headache, fatigue, or shortness of breath on the final stretch is common and usually resolves with rest, water, and pacing. Genuine warning signs — a headache that worsens with rest, vomiting, confusion, or difficulty walking straight — mean descend immediately.
  • Tell someone your plan: let your homestay or camp know your rough route and expected return time before you set out, same-day or overnight.
  • Cash, not cards: don't assume you can pay your way out of a problem with a card anywhere past Tapri.

Do you need a guide?

Not strictly, no — but it depends on how comfortable you are with a trail that isn't always clearly marked, especially past the busier lower stretches near the camps. We did the trek without one. Here's exactly how that went, including where we nearly lost the trail — worth reading alongside this guide if you're weighing the decision seriously.

Where to stay

In Yulla Khas, before the trek

We stayed at Bayul homestay, roughly ₹1,100 per person including breakfast and dinner. It's listed as 0.8 km uphill from the drop-off point, but that distance is almost entirely stairs and feels longer than the number suggests.

Near the summit, if not descending same-day

A camp close to the steep final stretch, roughly ₹1,000 per person including dinner and breakfast — the one we stopped at ourselves.

How to actually reach Yulla Khas

RouteOptionApprox. costApprox. timeWhat to know
Delhi → ShimlaOvernight bus₹1,100~9 hrsWhat we used — departs late evening, arrives with a full day ahead
Delhi → ShimlaToy train (via Kalka)VariesMost of a dayScenic but slow; book ahead in peak season
Delhi → ShimlaFlightHigher cost~4–4.5 hrsFastest, limited daily flights
Shimla → Reckong PeoNon-HRTC bus₹520Full dayWhat we used; HRTC buses also run this route, typically cheaper
Reckong Peo → TapriOnward bus——Continues from Peo; we reached Tapri by ~5:15pm on our travel day
Tapri → Yulla KhasCab₹800—We booked a cab after finding the bus too crowded
Tapri → Yulla KhasBus——Exists but can be crowded — have the cab as a backup plan

Door to door from Delhi, expect close to two full days of travel once you include the overnight bus and a full day moving through Peo and Tapri. Treat the travel itself as a meaningful part of the itinerary, not a quick add-on to a Shimla trip.

Booking practicalities: HRTC (Himachal Road Transport Corporation) buses can be booked through HRTC's own site or common bus-aggregator apps; non-HRTC private buses on the Shimla–Reckong Peo stretch are typically booked locally or through the same aggregator apps, and tend to run more frequently but can be more crowded, as we found. For the Tapri–Yulla Khas leg specifically, don't expect app-based cab booking to work reliably — this is arrange-in-person-or-through-your-homestay territory.

Getting back from Yulla Khas: plan this before you trek

Don't start the trek until you've figured out how you're getting back to Tapri.

There is no direct bus from Yulla Khas to anywhere else. Every onward journey — back to Reckong Peo, Shimla, or Chandigarh — routes through Tapri first.

A morning bus from Yulla Khas to Tapri does exist — ours ran at 9am — but don't assume the timing without checking. We didn't know it in advance, missed it, and ended up hitchhiking with a car headed the same direction for roughly ₹500 to reach Tapri. Ask at your homestay or camp the evening before about the next morning's bus timing rather than relying on a schedule you read online.

From Tapri, a bus onward to Reckong Peo costs around ₹80 — we took the 5pm departure. From Peo, we booked another cab (₹500) onward to Kalpa for the night.

If you're not staying overnight in Yulla Khas at all, the safer move is booking a return cab before you even start the trek, rather than counting on catching a bus back — the service on this stretch isn't reliable enough to build a same-day plan around without a backup.

Cost, per person

  • Delhi–Shimla overnight bus: ₹1,100
  • Shimla–Reckong Peo bus: ₹520
  • Tapri–Yulla Khas cab (split across group): ₹800
  • Homestay in Yulla Khas (incl. meals): ₹1,100
  • Camp near the summit, if overnighting up top (incl. meals): ₹1,000
  • Return transport toward Tapri (cab, bus, or hitchhiking backup): ₹500–800

This covers getting to Yulla Khas, doing the trek, and getting back to Tapri — not onward travel to other Kinnaur stops. Depending on group size and choices along the way, expect somewhere in the ₹4,500–6,000 range per person for this leg specifically.

On group size and cost: most of the variable cost here is the cab legs, which get cheaper per person the bigger your group. A group of 4 splitting an ₹800 cab pays ₹200 each; a solo traveller either pays the full fare, waits to share with other trekkers heading the same way, or takes the bus and accepts it may be crowded.

What to pack

Essential

  • Broken-in trekking shoes — ankle-support boots are worth the extra weight here, given how much of the trail is stairs and how easily tired ankles roll on the descent
  • At least 1 litre of water, refilled at the last camp before the final gate
  • A light rain layer
  • Warm layers for cold mornings and evenings
  • A power bank
  • Cash (don't count on ATMs in this part of Kinnaur)
  • A headlamp or torch
  • A basic first-aid kit: blister plasters or moleskin, a crepe bandage, paracetamol, personal medication, ORS sachets, and antiseptic

Useful additions

  • Trekking poles, especially for the stairs on the descent
  • Offline maps downloaded in advance
  • Extra snacks beyond what the camps offer
  • An extra pair of socks
  • Gloves or a cap depending on season

7 things we wish we knew

  1. The stairs are more tiring than the distance alone suggests — pace for stair-climbing, not a flat walk.
  2. The final 3 km is significantly harder than the rest of the trail, and deserves real time and rest, not a rushed push.
  3. Water availability changes completely after the final gate — the camps before it are your last guaranteed stop.
  4. Don't assume you'll have network past Yulla Khas — Airtel was the only carrier that worked for us.
  5. Don't rely on the return bus timing without confirming it locally the evening before.
  6. Homestay "distance" in Yulla Khas can be almost entirely stairs — it'll feel longer than the number suggests.
  7. Weather can completely change trail conditions — check it close to your trek day, not weeks in advance.

What we'd do differently

We'd ask about the Yulla Khas–Tapri bus timing the evening before instead of assuming we'd sort it out in the morning — that single gap cost us a scramble and an unplanned ₹500 hitchhike. We'd also build in a bit more acclimatization time around Shimla or Peo rather than moving through quickly, given the altitude gain over a short span of days.

FAQs

Is Yulla Kanda safe?

Yes for most reasonably fit trekkers who check the weather beforehand and plan their return transport in advance. The trail isn't technical, but rain, daylight, and transport logistics are all real factors to plan around.

Is Yulla Kanda suitable for beginners?

It's manageable for a first Himalayan trek if you're generally fit and comfortable with sustained stair-climbing, but the steep final 3 km is genuinely demanding — go in expecting that, not a casual walk.

Can Yulla Kanda be done in one day?

Yes, with a pre-sunrise start and a target of being back by 7pm. An overnight stay gives you a more relaxed pace if you'd rather not compress it into one long day.

Do you need a guide?

Not strictly, though the trail isn't always clearly marked past the lower stretches. We did it without one.

Is there mobile network on the trail?

Airtel worked for most of our route; other carriers didn't.

Is water available on the trail?

Yes, at camps before the final gate. After that, there's no reliable water source — carry at least 1 litre.

Where do you stay?

A homestay in Yulla Khas before the trek (we stayed at Bayul, ~₹1,100/person with meals), and optionally a camp near the summit if you're overnighting at the top.

How much does the trek cost?

Roughly ₹4,500–6,000 per person for the full Delhi-to-Yulla Khas leg including the trek, based on our own spending.

What is the best time to visit?

Late spring through early autumn, avoiding heavy monsoon rain. We went in June with good conditions.

Can you trek during monsoon?

It's riskier — check conditions in the days immediately before you go rather than weeks in advance, since rain increases the chance of a slippery trail.

How do you get back from Yulla Khas?

Everything routes through Tapri first — there's no direct bus anywhere else. Confirm the morning bus timing locally the evening before, or book a return cab in advance if you're not staying overnight.

What should you carry?

At minimum: sturdy shoes, water, a rain layer, warm layers, a power bank, cash, and a headlamp. See the full packing list above.

Do you need a permit (ILP) for Yulla Kanda?

No — not for Indians, and not for foreign nationals either. Kinnaur's Inner Line Permit requirement only starts beyond the Jangi checkpost, well past Reckong Peo, which is further along than this trek goes.

Should you acclimatize before the trek?

It's not mandatory, but worth considering given the altitude gain over a short span of days. Narkanda, Sarahan, Sangla, or Kalpa all work as a break-journey night.

Is Yulla Kanda suitable for kids or older trekkers?

There's no hard age limit, but be realistic about what "fit" means here: hours of sustained stair-climbing, not just general good health. The overnight option is usually the easier call for families.

What's the story behind the temple?

Local legend attributes it to the Pandavas during their Himalayan exile, though the exact origin story varies depending on who you ask locally — treat it as oral tradition rather than settled history.

What if I have a medical emergency on the trail?

The nearest hospitals are a private multi-specialty hospital in Sholtu near Tapri, and the government Regional Hospital in Reckong Peo for anything more serious. Police Station Tapri is the nearest station. Tell your homestay or camp your rough plan before you set out.

The bottom line

Yulla Kanda isn't a trek to be intimidated by, but it also isn't one to walk into casually. The trail itself is manageable for most reasonably fit trekkers; the real planning work is in reading the weather correctly, timing your return before dark, carrying enough water for the unsupported final stretch, and — most of all — not assuming the transport back down will simply work itself out. Get those right, and this is one of the more rewarding offbeat treks in Himachal, without the crowds of the more famous routes nearby.

Read the full, unfiltered trip report: what actually happened when we did it ourselves.

Yulla Kanda Trek Guide · written from a self-guided June trip
0 0 votes
Article Rating
Subscribe
Notify of
guest
0 Comments
Oldest
Newest Most Voted
0
Would love your thoughts, please comment.x
()
x